Creating Playlists
When the “New Playlist” button is clicked, a new window will open where the new playlist will be created. This is also the same window that opens when the “Edit” button is clicked. This window is where all playlist creation and editing takes place.
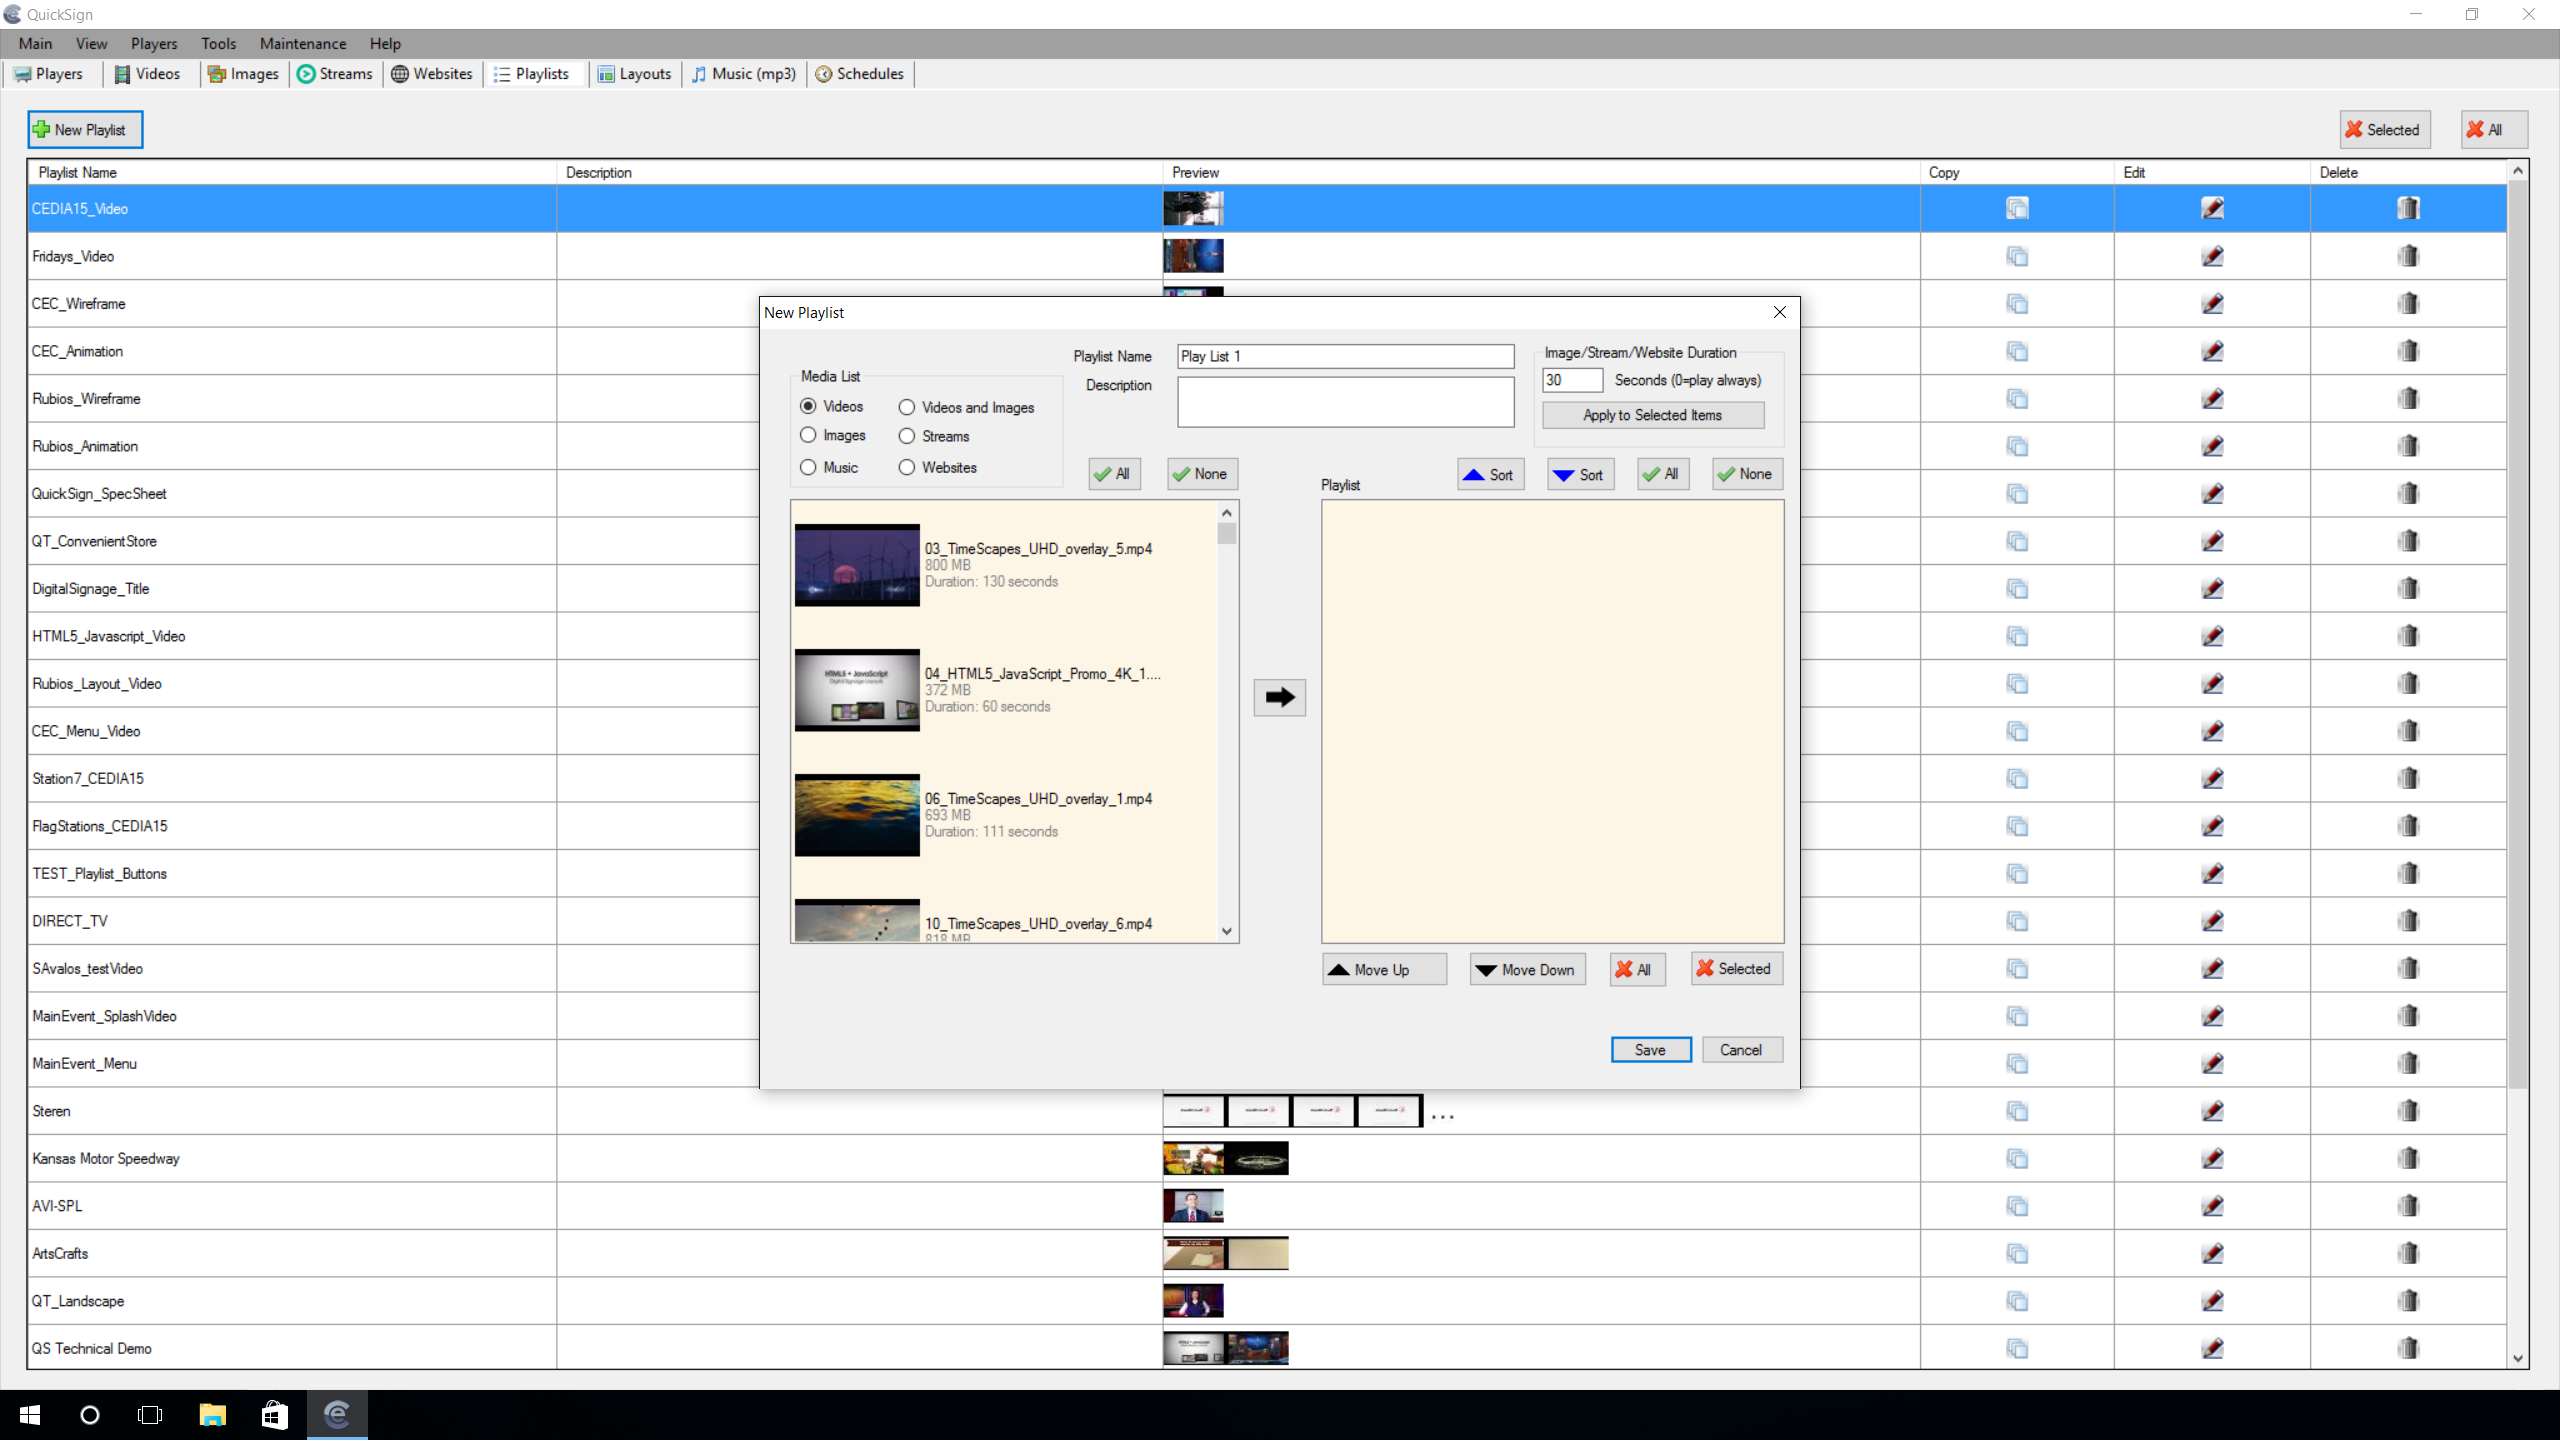
In this window, at the top center, users can set a name for their playlist and a description of the content if they choose. Playlists must have a name, and if one is not entered, the software will assign a name of “Play List” and a number that is automatically appended to the next available playlist number. Playlist descriptions are not required, but can help distinguish one playlist from another.
The “Media List” area at the top left is where the user will select what kind of content they want to use in the playlist they are creating. When one of the content types is selected, that content will show in the content window below. Only one type of content can be selected at a time, but the users can change the selected type at any time during the playlist creation process. This allows users to use all types of content in their playlist. The reason it is limited to one type at a time is so to not overfill the content window.

After selecting the desired content type, users can select in any order the content that they want to add to the playlist and either drag it to the right window, or click the arrow button between the windows to add content.
The window on the left shows what content is available, and the window on the right show what content has been added to the playlist.
The content in the right window is set in the order in which it will play throughout the playlist. Files can be moved up and down by dragging them with the mouse or using the “Move Up” and “Move Down” buttons below the window.
Files can be sorted by file type and name by using the “Sort” up and down buttons at the top of this window. Files can also be deleted using the delete selected or delete all buttons at the bottom.
Users can also select and deselect all files by clicking the “Check” All or “Check” None buttons above the window.
When adding content to a playlist it is important to know that video and music files will play to their pre-determined duration that they have from their original creation. Images, Streams and Websites do not have a pre-determined duration as they are static. The software assigns default duration to these of 30 seconds.
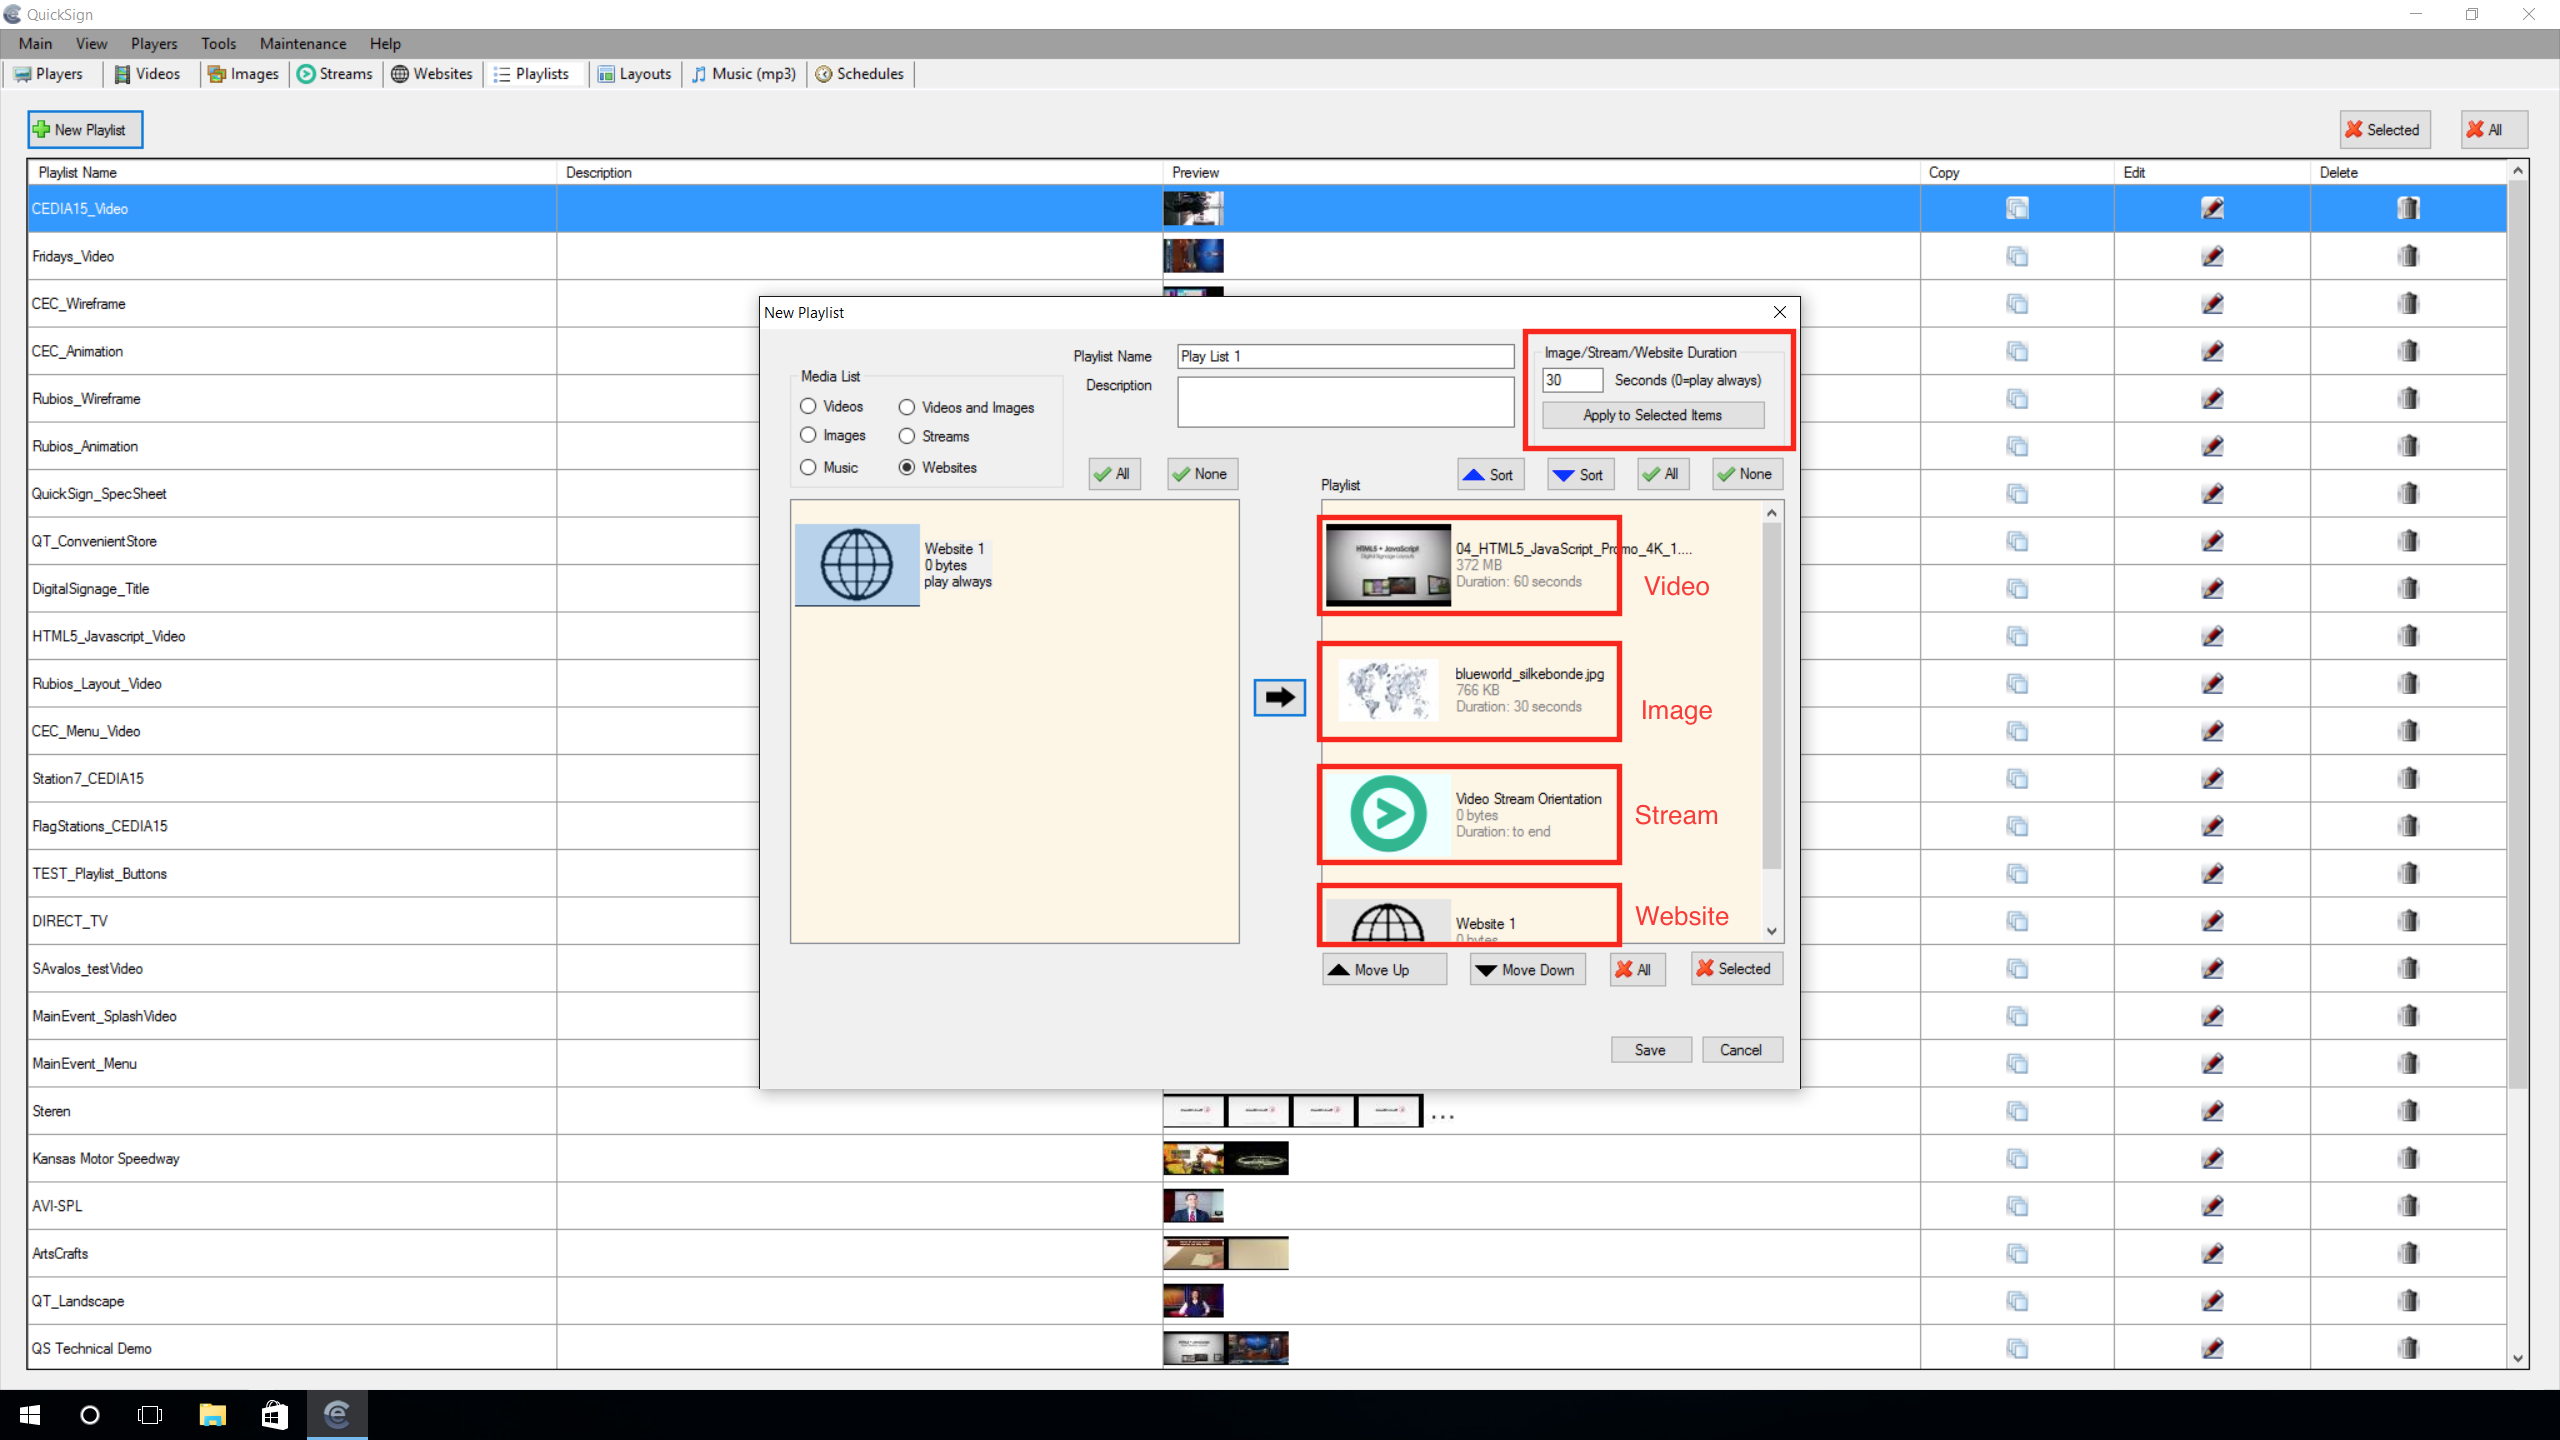
Users can change the duration of one or multiple files in the “Image/Stream/Website Duration” area in the top right of the playlists window.
Duration is configured by number of seconds. For example 5 minutes would be entered as 300 seconds.
If the user wants to have an image, stream or website play continuously, a duration of “0” should be entered. This tells the software that the selected file is to play always. If only one image, stream or website is in a playlist and a duration of “0” is not entered, the image will reload every 30 seconds as the playlist repeats.
Finally the user will click the “Save” button at the bottom of the “Playlist” window to save their playlist and add it to the list of playlists under the “Playlists” tab.